How to Set Up Microsoft 365 Rooms in Conferfly

The recommended way to manage a Microsoft room in Conferfly securely and efficiently is to sign up using the actual conference room resource account directly in Conferfly. With this approach, each room has its own dedicated Conferfly account, and the same account is used for both Conferfly and Microsoft Teams. This ensures seamless calendar access by default and avoids permission issues.
Recommended Setup (For Most Organizations)
For the vast majority of organizations, this is all you need to do, and this is the setup we strongly recommend.
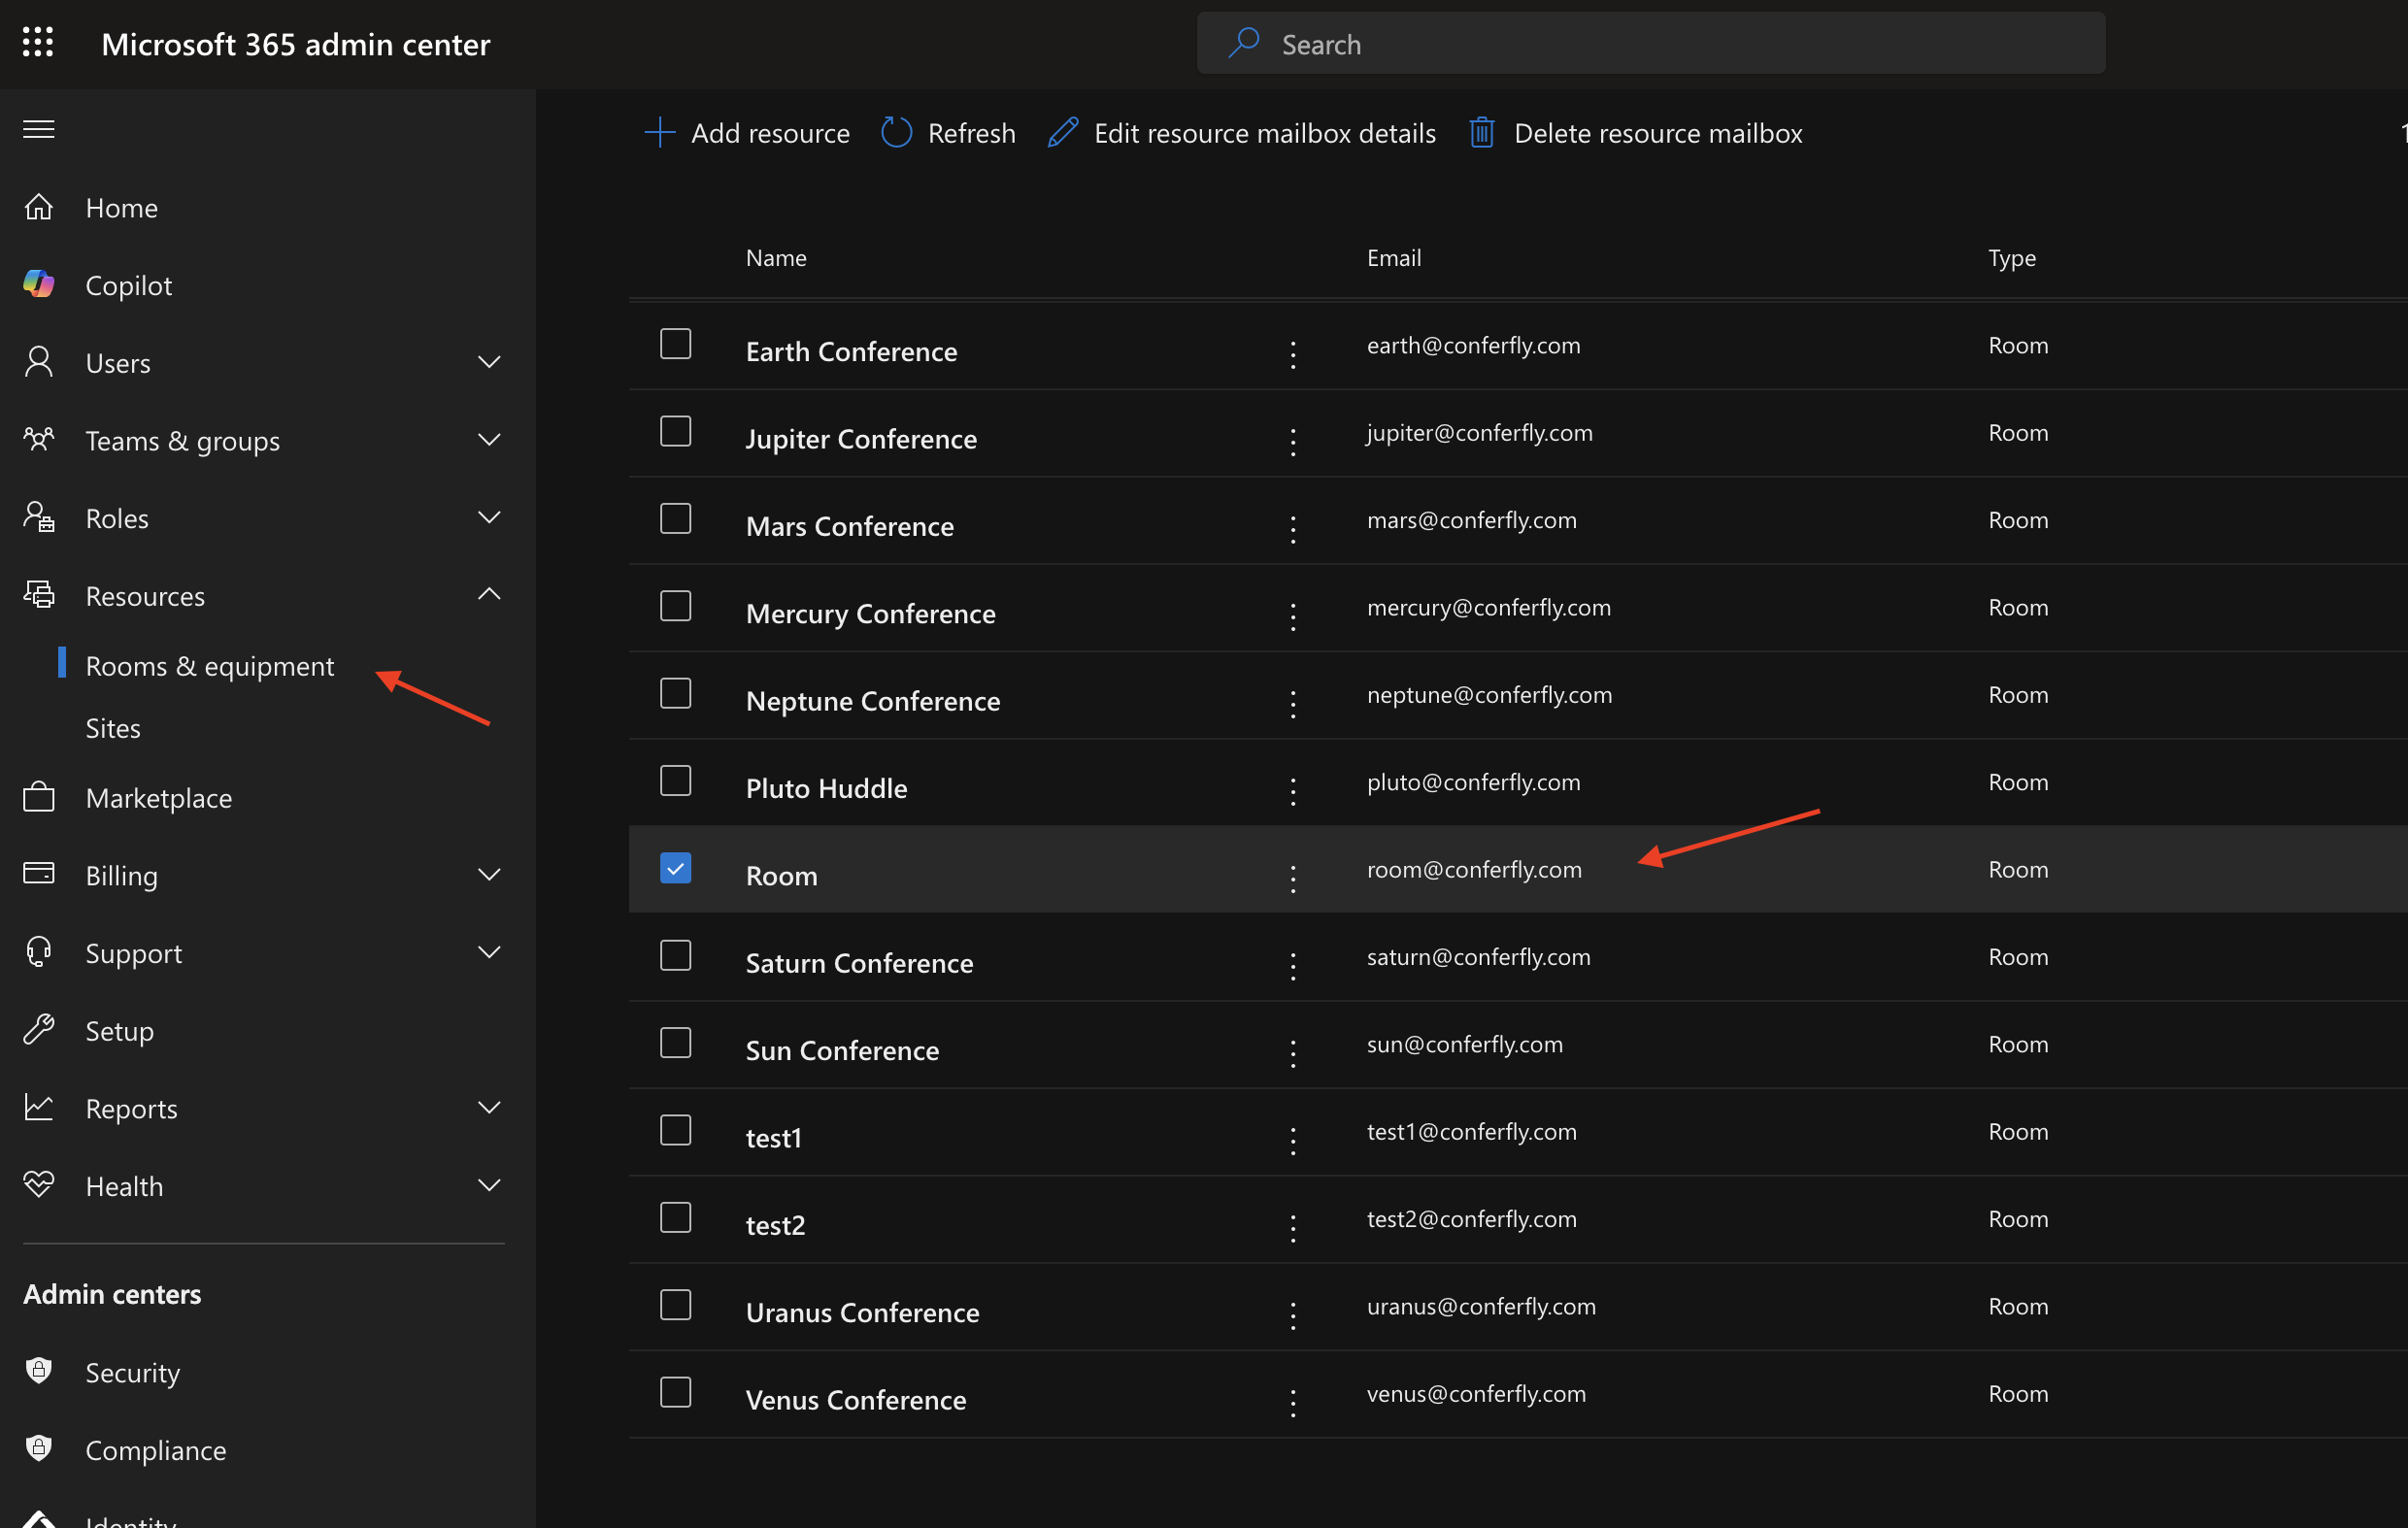
- Locate the Room Resource Account in Microsoft 365:
Find the conference room resource account in Microsoft 365 as shown in the image below. This account will be used to sign in to both Conferfly and Microsoft Teams.
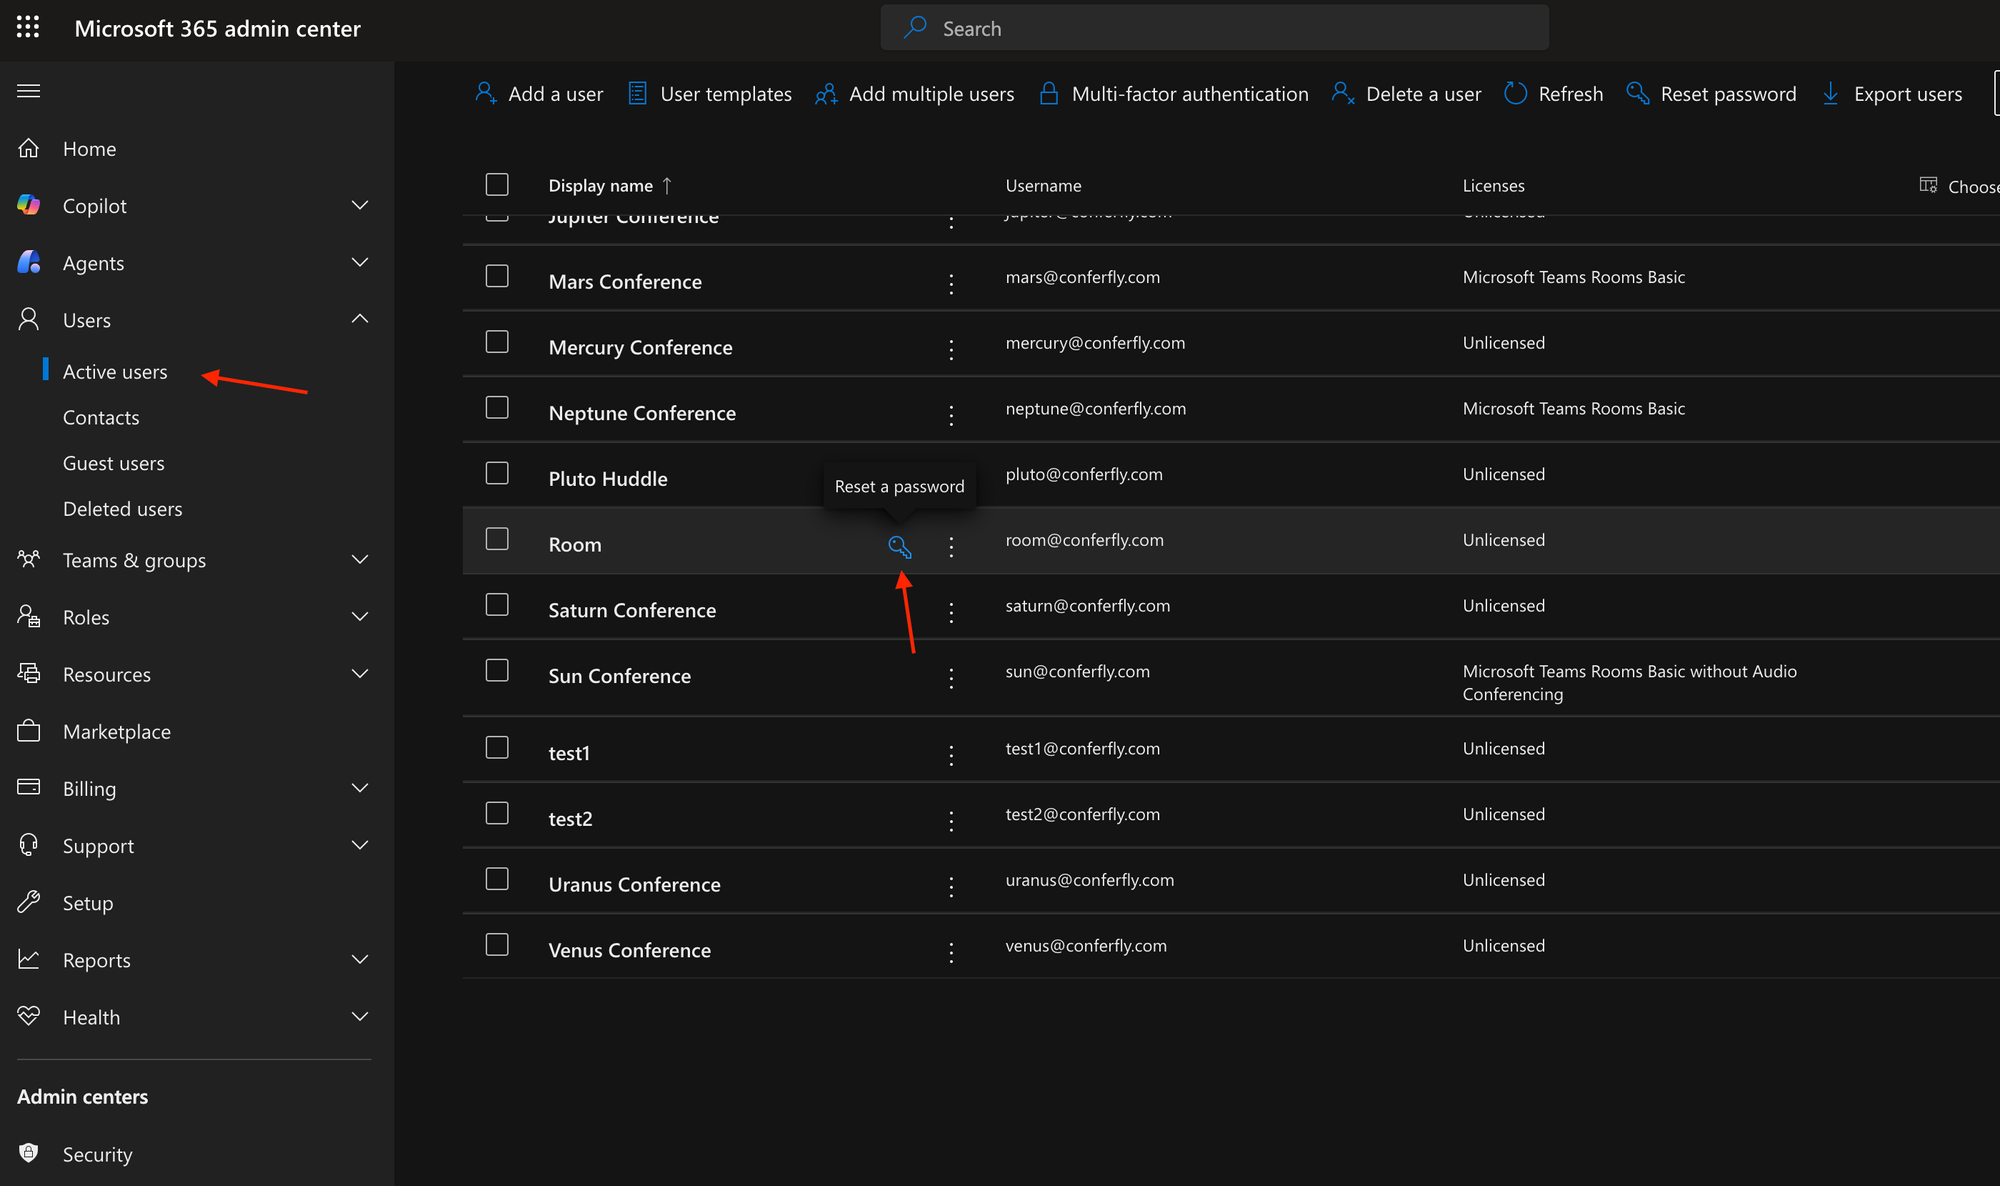
- Set the Password (if not set):
Ensure the conference room resource account has a password configured. Some accounts may be created without a password, which must be set before signing up.
- Assign a Microsoft Teams License:
If the resource account does not have a license yet, Microsoft provides up to 25 Microsoft Teams Rooms Basic licenses for free. Assign one of these licenses to the room account. click here. - Sign Up in Conferfly:
Use the conference room resource account to sign up in Conferfly and import the room. The room linked to this account will be highlighted in blue, indicating it is the only room associated with this account.
Note: If you have more than 10 rooms and need to consolidate all billing into one invoice, contact us at [email protected].
Important Recommendation
We strongly recommend the setup above. It is the most secure, reliable, and low-maintenance way to manage rooms in Conferfly.
Only continue with the setup below if you have a specific requirement to manage all rooms under a single service account or to centralize all rooms under one Conferfly account.
Alternative Setup: Central Service Account Model
If your organization needs to manage all Conferfly rooms using one service account, follow the steps below.
Step 1: Create an Account for Conferfly in Microsoft 365
- Go to the Microsoft 365 Admin Portal.
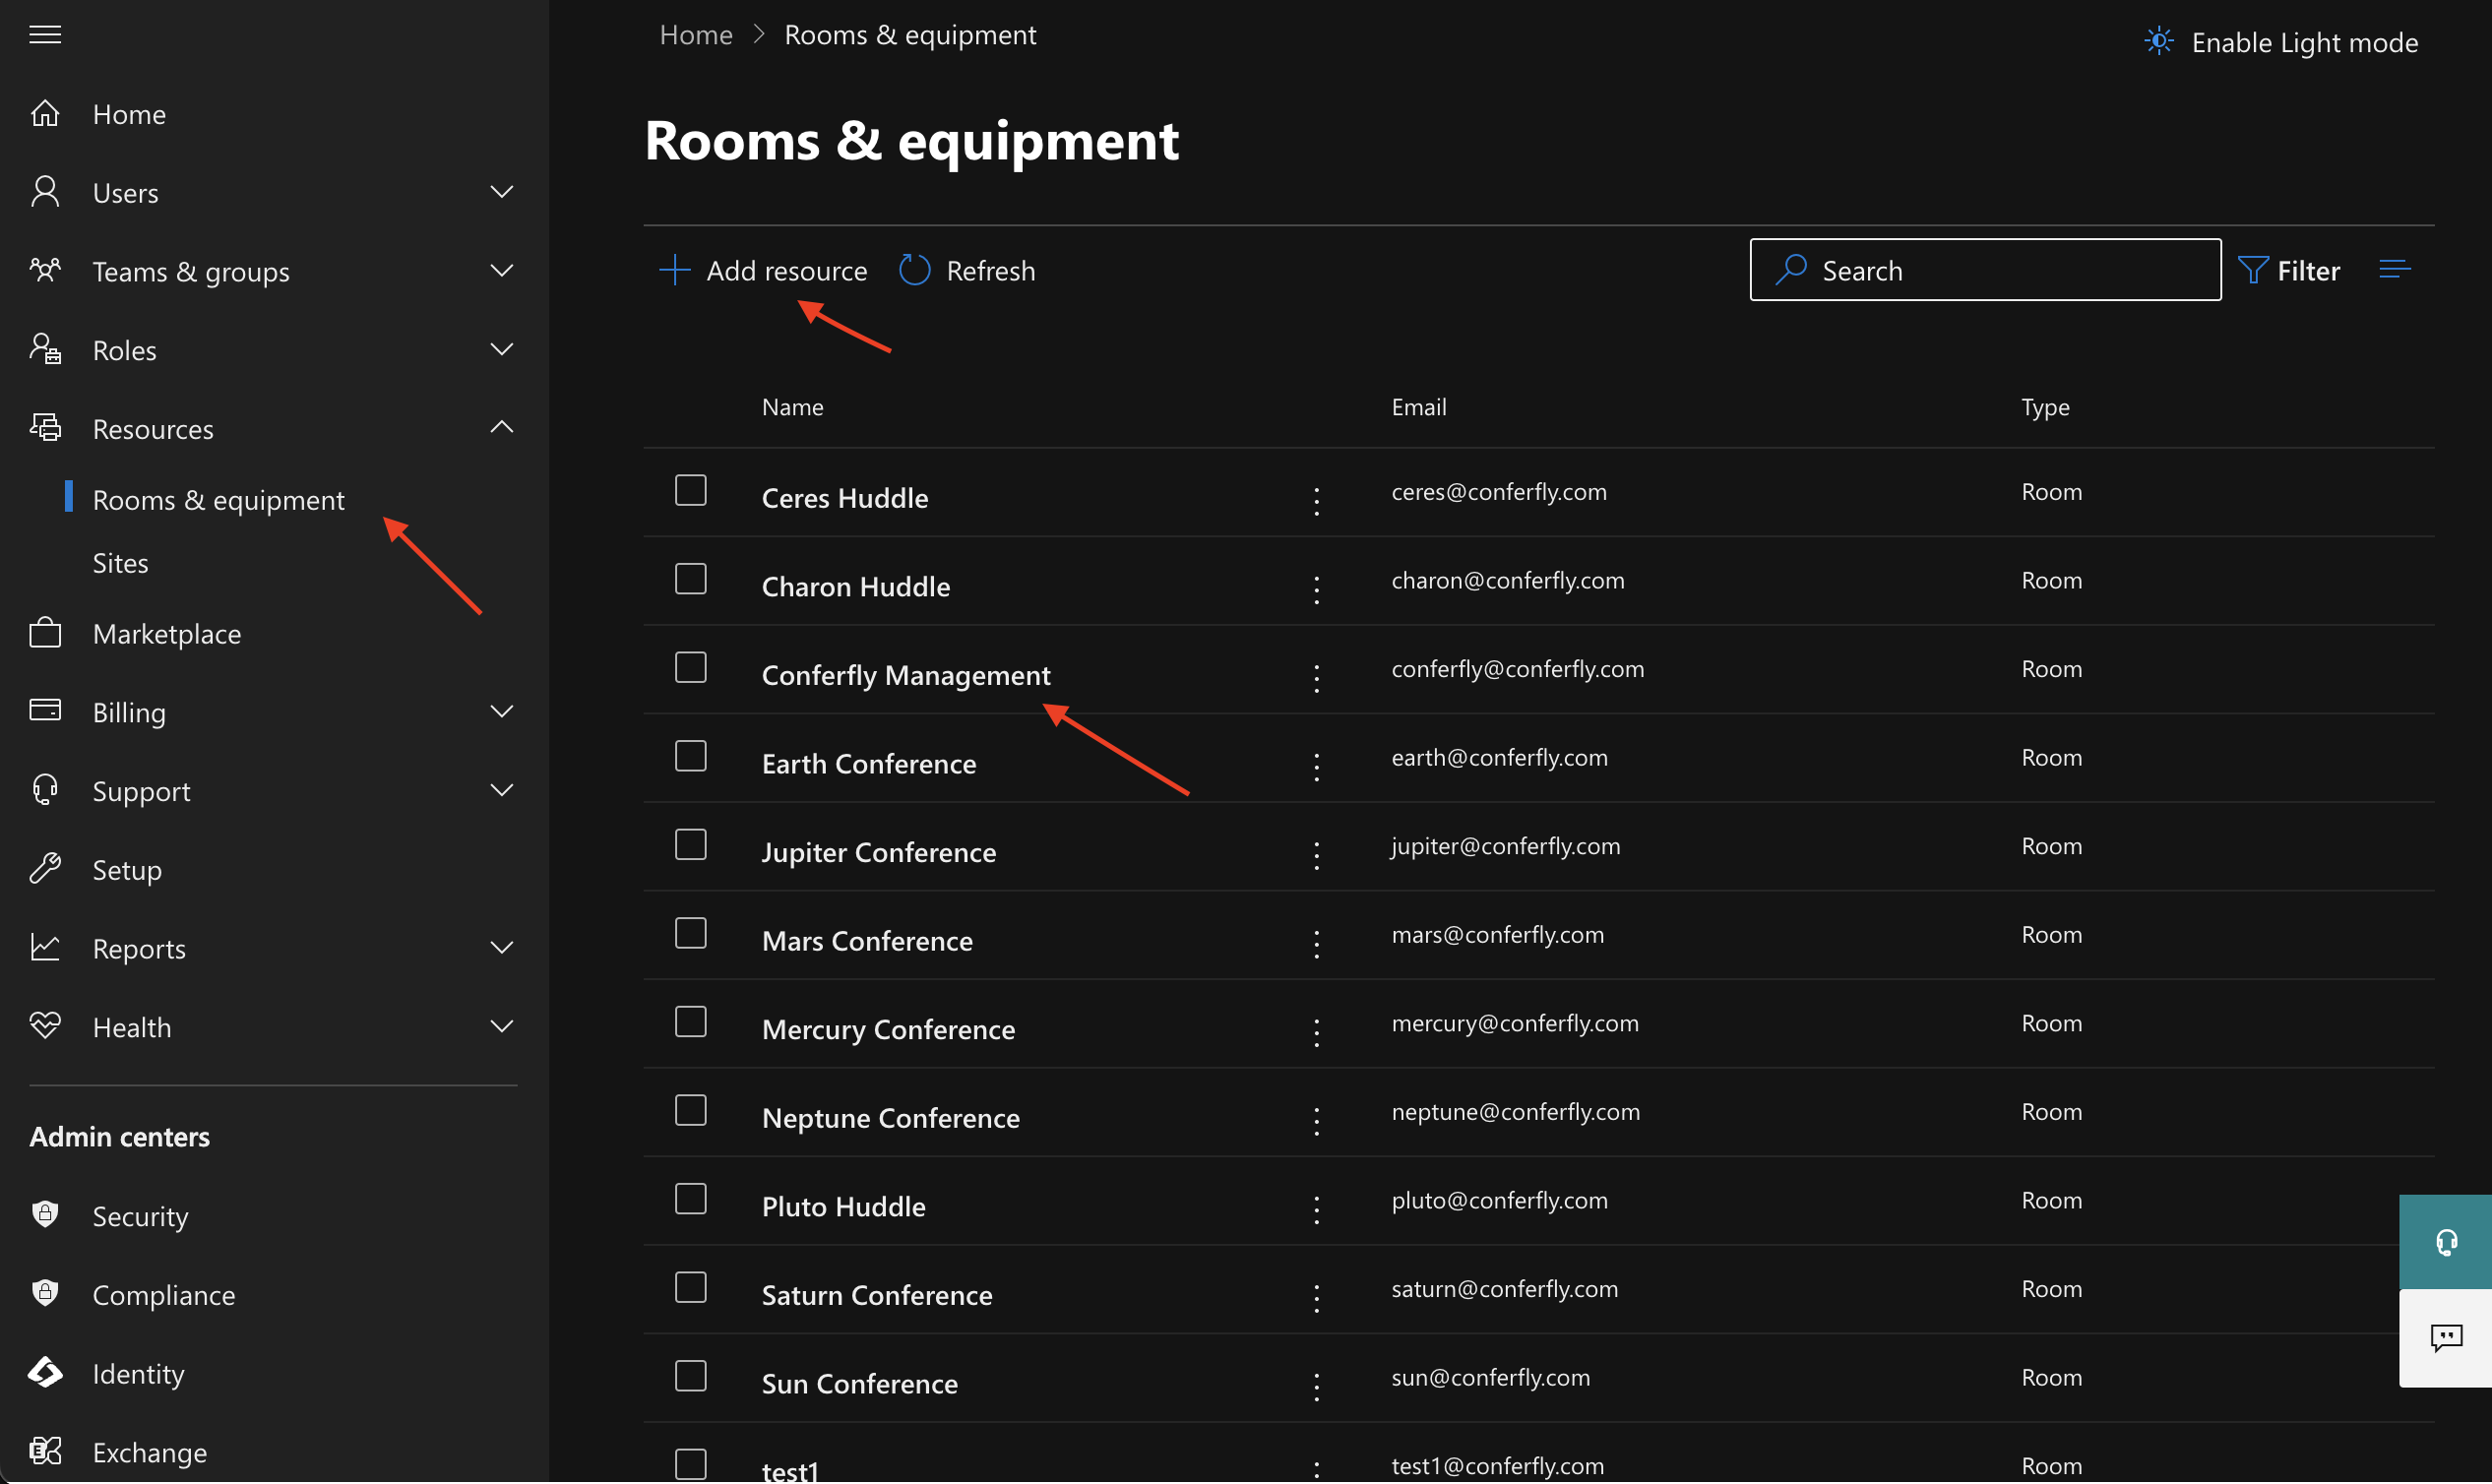
- Create a new resource with the type "Room."
- Set the new resource email address to something like [email protected].
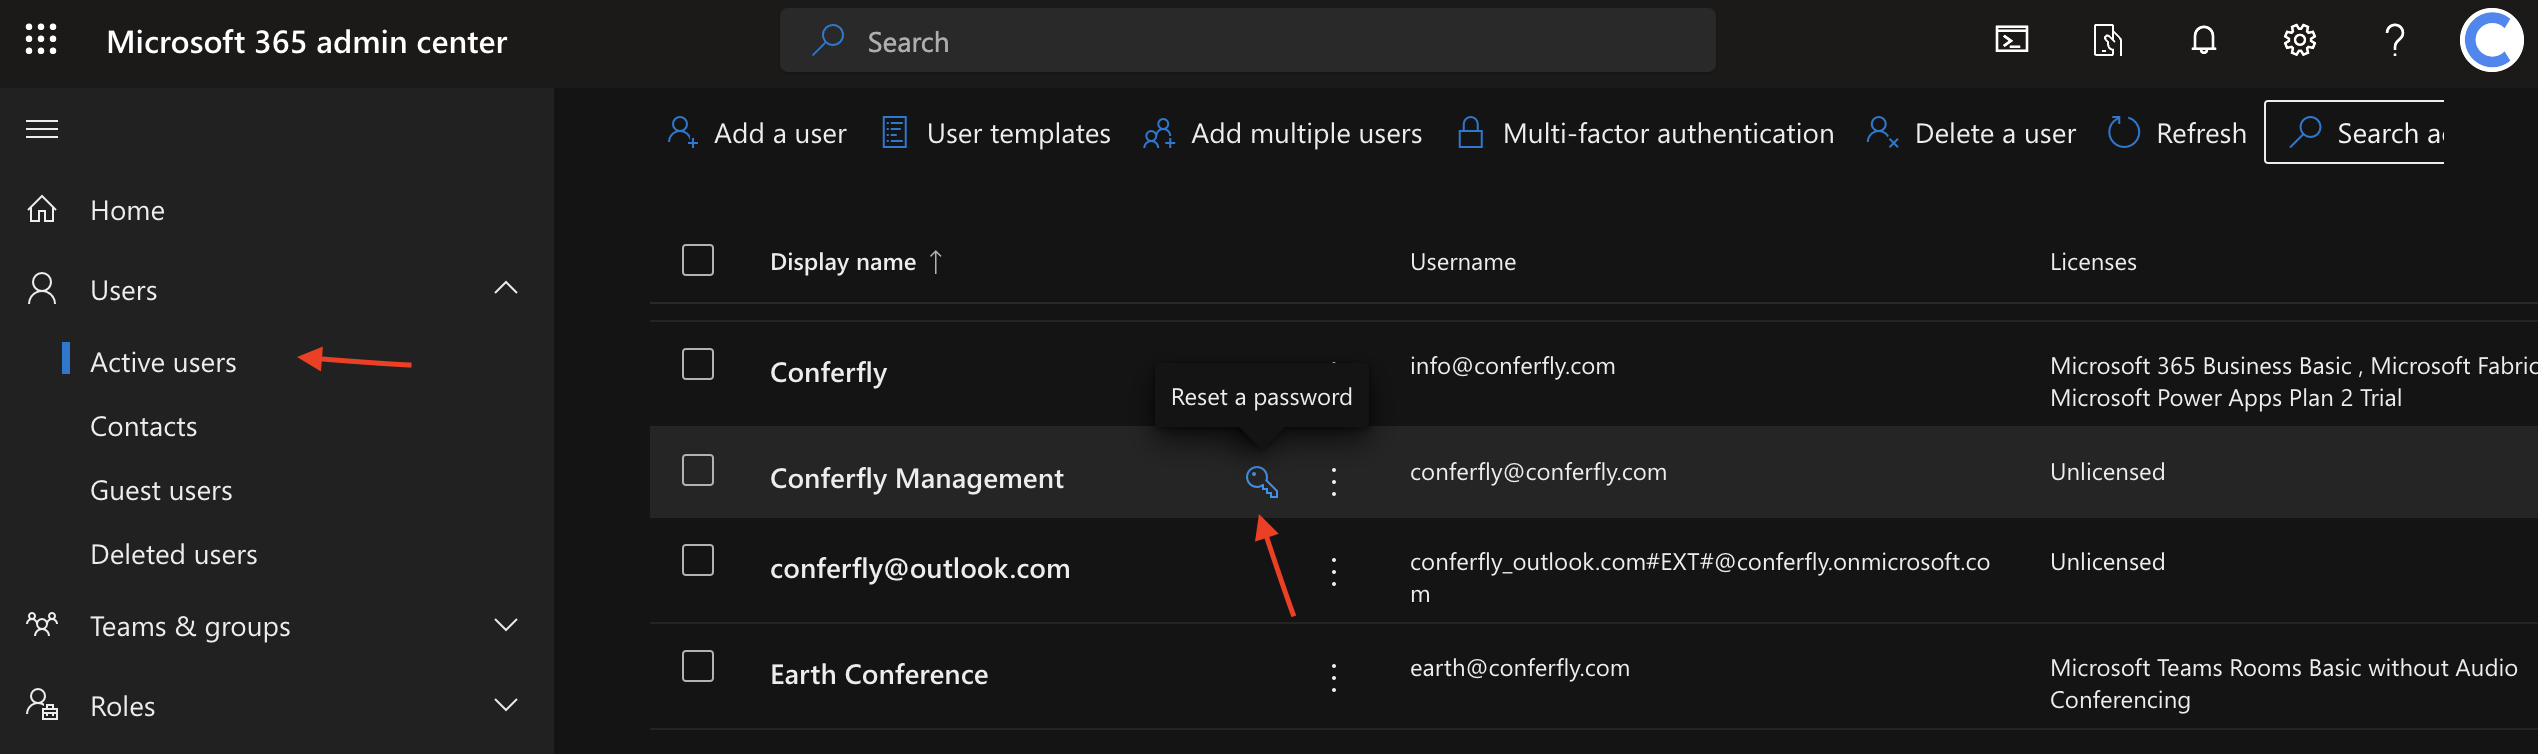
- Set a password for [email protected] under the Users section, and ensure that the password does not need to be changed or expire for this service account.
Here's an example of the steps above.
Step 2: Sign Up for Conferfly with the New Account and Import Rooms
- Go to the Conferfly.com website.
- Sign up using the [email protected] email.
- Follow the Conferfly prompts to import all your rooms.
Step 3: Grant the Conferfly account access to calendars of rooms.
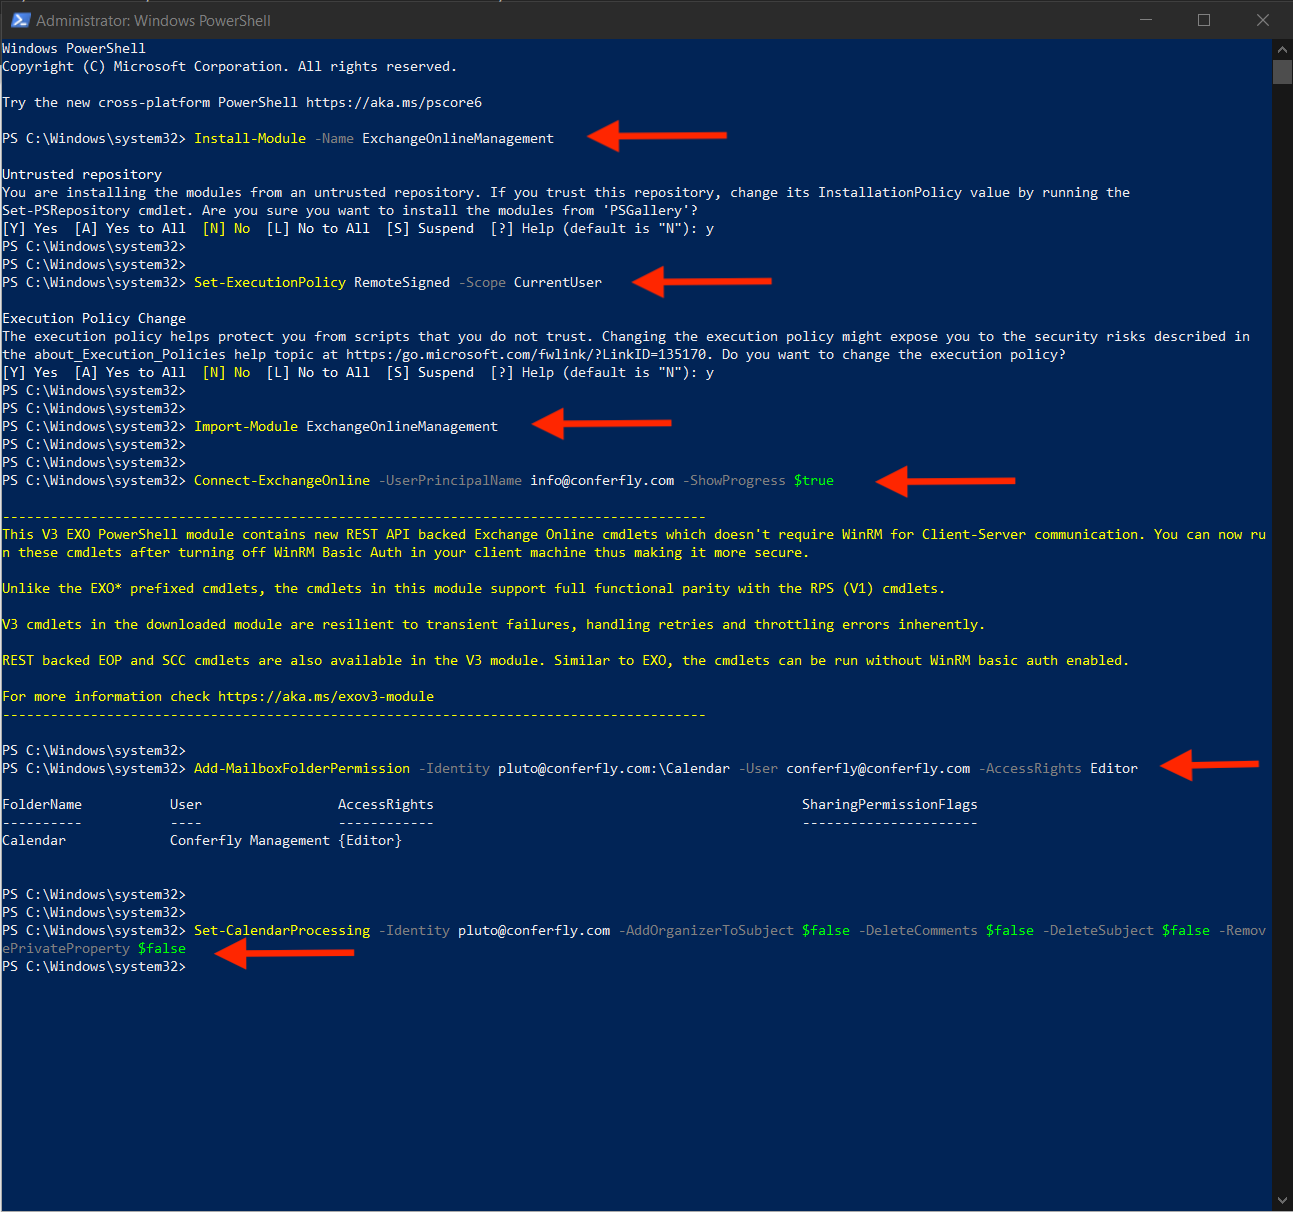
On your local PC, open PowerShell as Administrator by right-clicking on PowerShell and selecting "Run as Administrator". Then, run the following commands:
Install the Exchange Online Management Tool:
Install-Module -Name ExchangeOnlineManagement
Set the Execution Policy:
Set-ExecutionPolicy RemoteSigned -Scope CurrentUser
Import ExchangeOnlineManagement
Import-Module ExchangeOnlineManagementLog in to Exchange Online via PowerShell:
Replace [email protected] with your admin email.
Connect-ExchangeOnline -UserPrincipalName [email protected] -ShowProgress $true
Grant Access to the new Conferfly account:
Replace room@mycompany.com with your room email and conferfly@mycompany.com with your Conferfly account email.
Add-MailboxFolderPermission -Identity [email protected]:\Calendar -User [email protected] -AccessRights Editor
Enable Showing Meeting Title and Description for Events:
Replace room@mycompany.com with your room email.
Set-CalendarProcessing -Identity [email protected] -AddOrganizerToSubject $false -DeleteComments $false -DeleteSubject $false -RemovePrivateProperty $false
Repeat the last two commands for each room you have.
Here's an example of running the commands above.
Note: If you are still unable to see the meeting details, try creating a new event. Older calendar events may retain previous sharing settings.
By following these steps, you can ensure that the Conferfly account has the necessary permissions to view all necessary conference room calendars, streamlining the room management process.
If you need assistance, please reach out to us at [email protected], and we will be happy to help you.


