How to Set Up Conferfly (Comprehensive Guide)

This guide is for IT staff setting up Conferfly in conference rooms. For user instructions on how to use Conferfly, please click here for Microsoft 365 and here for Google Workspace.
Conferfly is a tool for conference rooms that lets you join any call with just one click or tap. We aim to make the conference room experience as frictionless as possible and intentionally separate our app from all meeting platforms.
How Does Conferfly Work?
Conferfly is built as a progressive web app and will leverage web app versions of Zoom, Teams, Google Meet, Webex, etc. (However, you can still use the native apps of these platforms with limited automation from Conferfly, and you’ll need to update them regularly).
When you sign up for Conferfly, you will be prompted to grant Conferfly access to your conference room calendars. Conferfly will then import the rooms and continually sync with those calendars to retrieve the next upcoming events, allowing you to join meetings with just one tap or click.
How to setup Conferfly in your conference rooms.
Requirements:
- A business account on Google Workspace or Microsoft 365.
- Conference room resources are added to the Microsoft 365 or Google Workspace account.
Note: If you haven’t set up resource calendars, you can learn how by clicking here for Microsoft 365 or here for Google Workspace.
(Also, you can use your personal calendar or any calendar you have access to as a room in Conferfly, but you have to add it manually in settings).
3. A physical conference room with a PC and Chrome browser.
If you aren’t sure whether these requirements are met, we suggest you open your business calendar and attempt to add a conference room to an event. If you can do this, you are ready to use Conferfly.
If conference rooms aren’t available in your calendar, then it’s useful to know that conference rooms are usually managed via a conference room booking system. The booking system is often managed through Google / Microsoft Outlook or managed via a third-party conference management system. You need to have this set up before using Conferfly, either through your calendar provider or a third-party conference management system.
For physical devices, your conference room will require any computer or tablet that connects to a monitor, speakers, and a room microphone. We work with any device that has Chrome, and we’ve made some recommendations here if you are setting this up for the first time.
If your conference rooms only have a monitor that mirrors your computer screen (that is, no computer or tablet device), then you cannot run Conferfly without adding a computer to your room. The monitor-only set up may work, but it can waste company time, as employees need to troubleshoot connecting to the monitor before every meeting. This takes much more time than simply one-click joining a call.
Our Set-Up Process
Step 1: Click “Try Free” to sign up
Microsoft 365:
We recommend signing up with the conference room resource account directly in Conferfly. Each room will have its own Conferfly account. Check this guide to learn more.
Additionally, log in with the conference room resource account to Teams (browser/app) in each room. This resource account will join as a participant in each call in the room. You need a Teams license for each room (Microsoft offers 25 free Teams Rooms Basic licenses per account; to learn how to add them, click here).
Note: Microsoft won’t allow one account to join two Teams calls simultaneously.
Google Workspace:
We recommend creating a dedicated conference room account to use with Conferfly, e.g., [email protected] to manage the rooms and to use the same account to join Google Meet calls in each conference room.
If you have multiple locations, we recommend creating a separate account for each location, as Google does not allow the same account to join the same call more than once.
You can also disable all apps in Google Workspace Admin for this account, such as Drive and Chat, leaving only Google Meet and Calendar enabled for enhanced security.
Also, under Google Workspace Admin > Session Control, select "session never expires" for this account so it stays logged in. To learn how, check this guide.
Important: Make sure the account you are using with Conferfly doesn't require a password change at regular intervals. Any time the password is changed, Conferfly will be logged out.
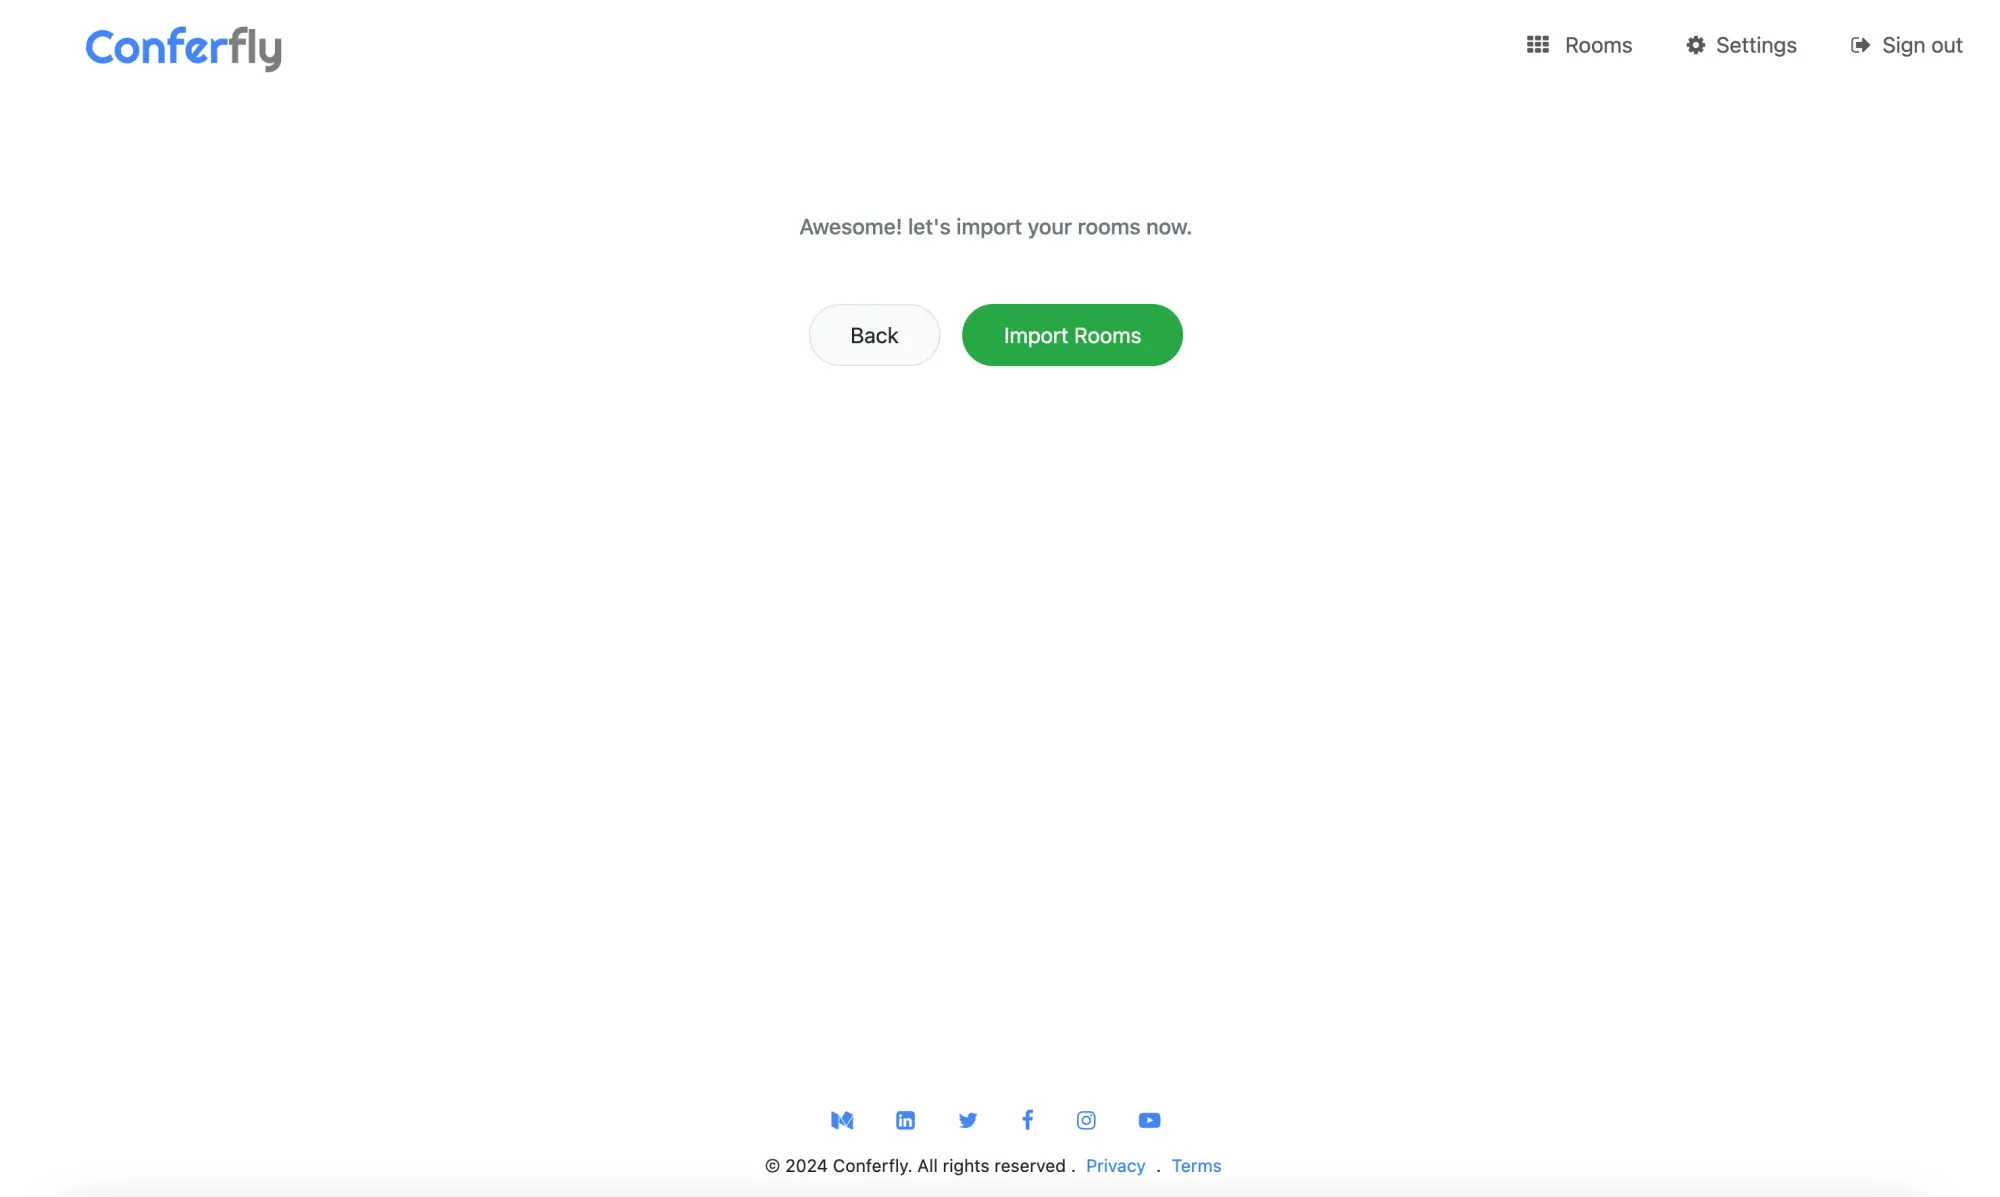
Step 2: Import Rooms
If your business account has rooms set up, you should be able to import rooms. You can also click the “Add Rooms” button in the settings tab to manually add rooms.
Step 3: Initial Setup Complete
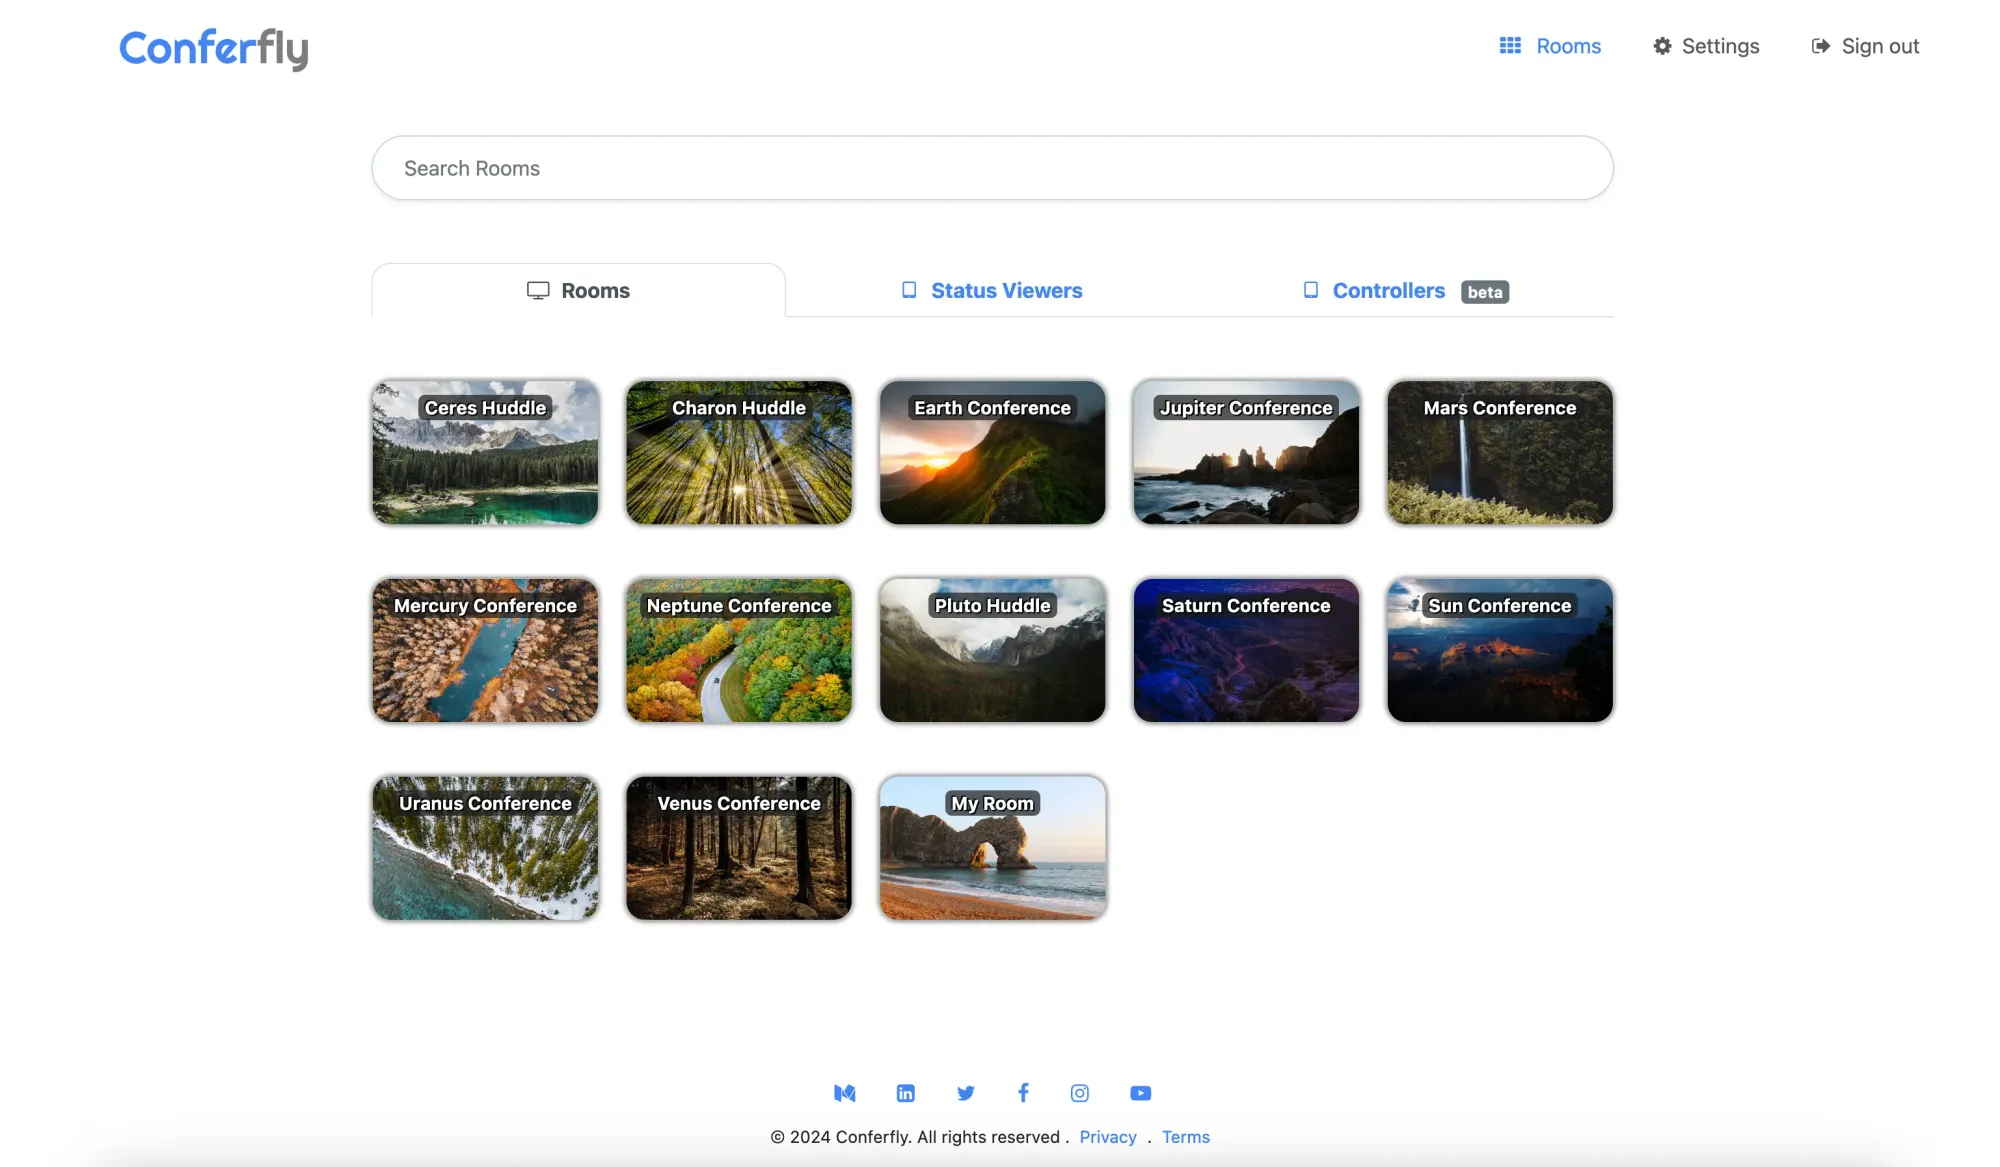
If everything works, the setup will take you to a page where you can see all of your available rooms. If your rooms show up, your initial setup is complete!
Step 4: Personalize Rooms
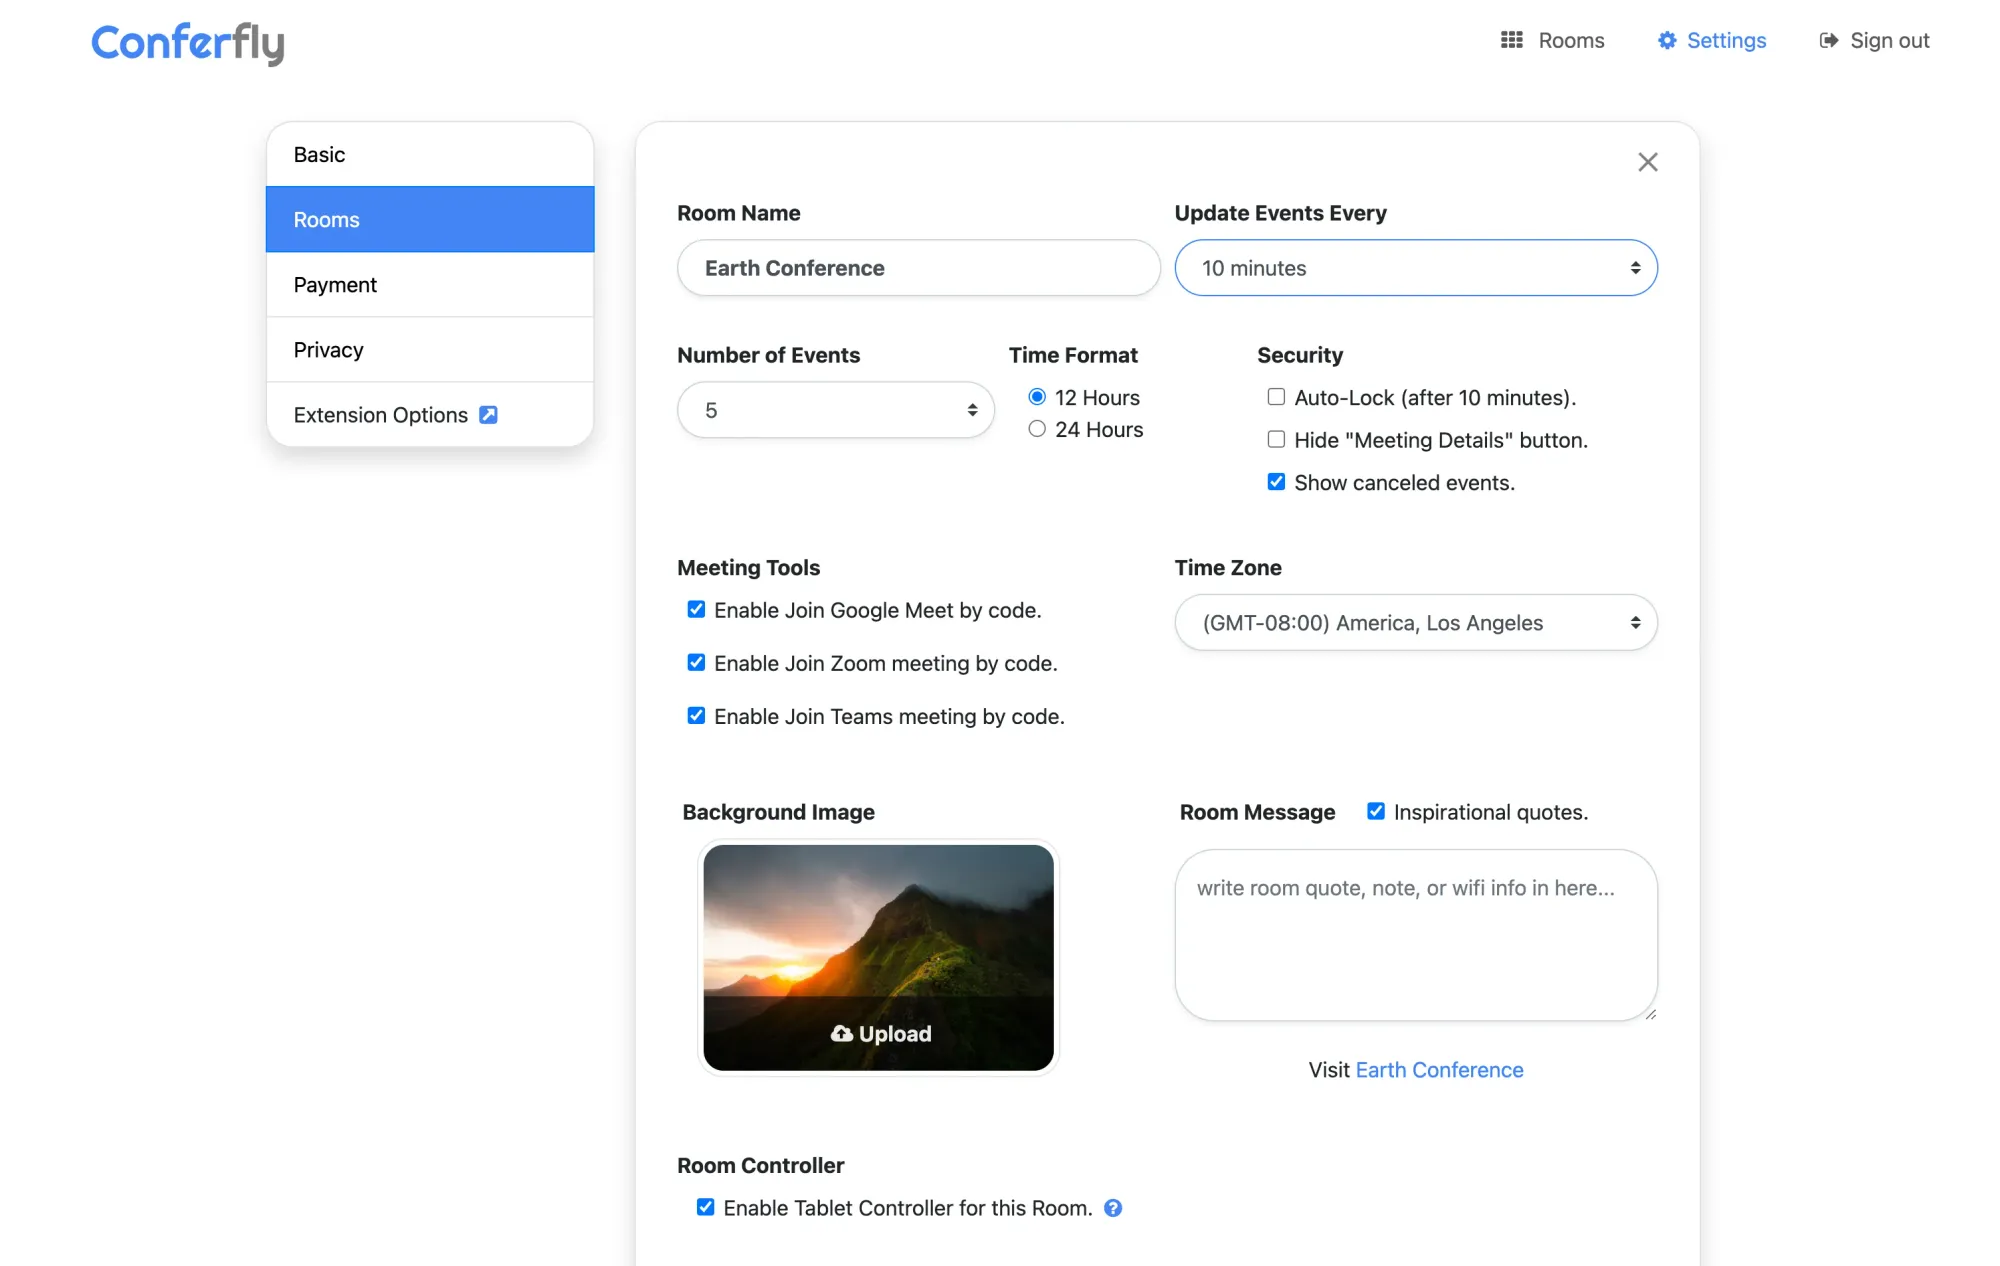
Navigate to Settings > Rooms > Click on a Room to open the room settings page. Here, you can customize how your events will be displayed on your conference room monitor. You also have the option to personalize settings such as background image, room message, meeting tools, time zone, refresh rate, etc. Additionally, if you are using a tablet to start the meetings, you can enable the tablet controller. Click here for tablet controller setup instructions.
Step 5: Test Your First Meeting
To test that your videos are working in your conference room, create a calendar event with a video call and add your conference room to the location field of your calendar event. It should be selected from a pre-populated list of conference rooms.
Step 6: Head To Your Conference Room
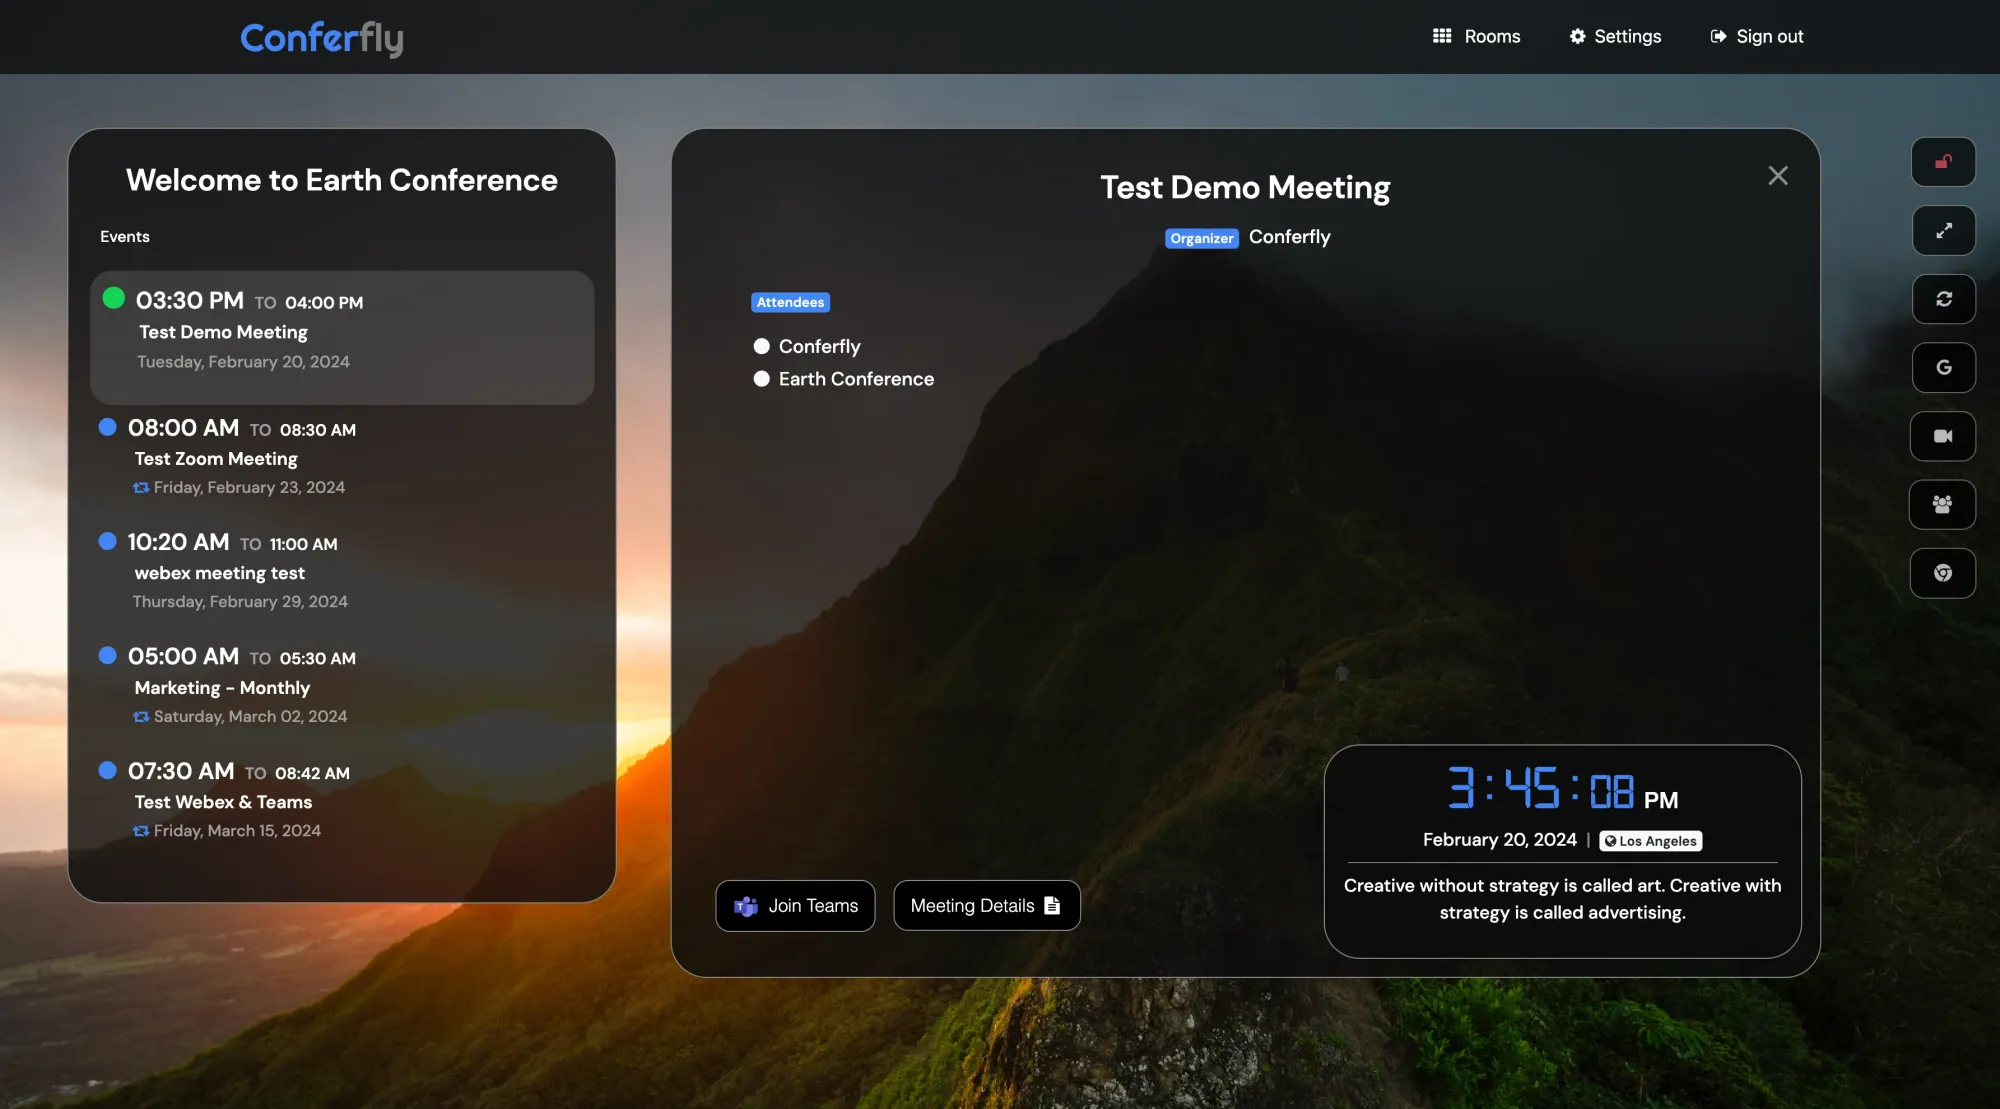
Assuming your conference room device is turned on and connected to the monitor, open your Chrome browser on the device and navigate to https://conferfly.com/signin to log in. You should now see the Conferfly Rooms page displayed on your monitor. Click on the room that you want to set up. You will then see the events scheduled for the day displayed on the left, with the current meeting shown in the middle if it’s live, as shown in the image below.
Step 7: Install Conferfly Extension
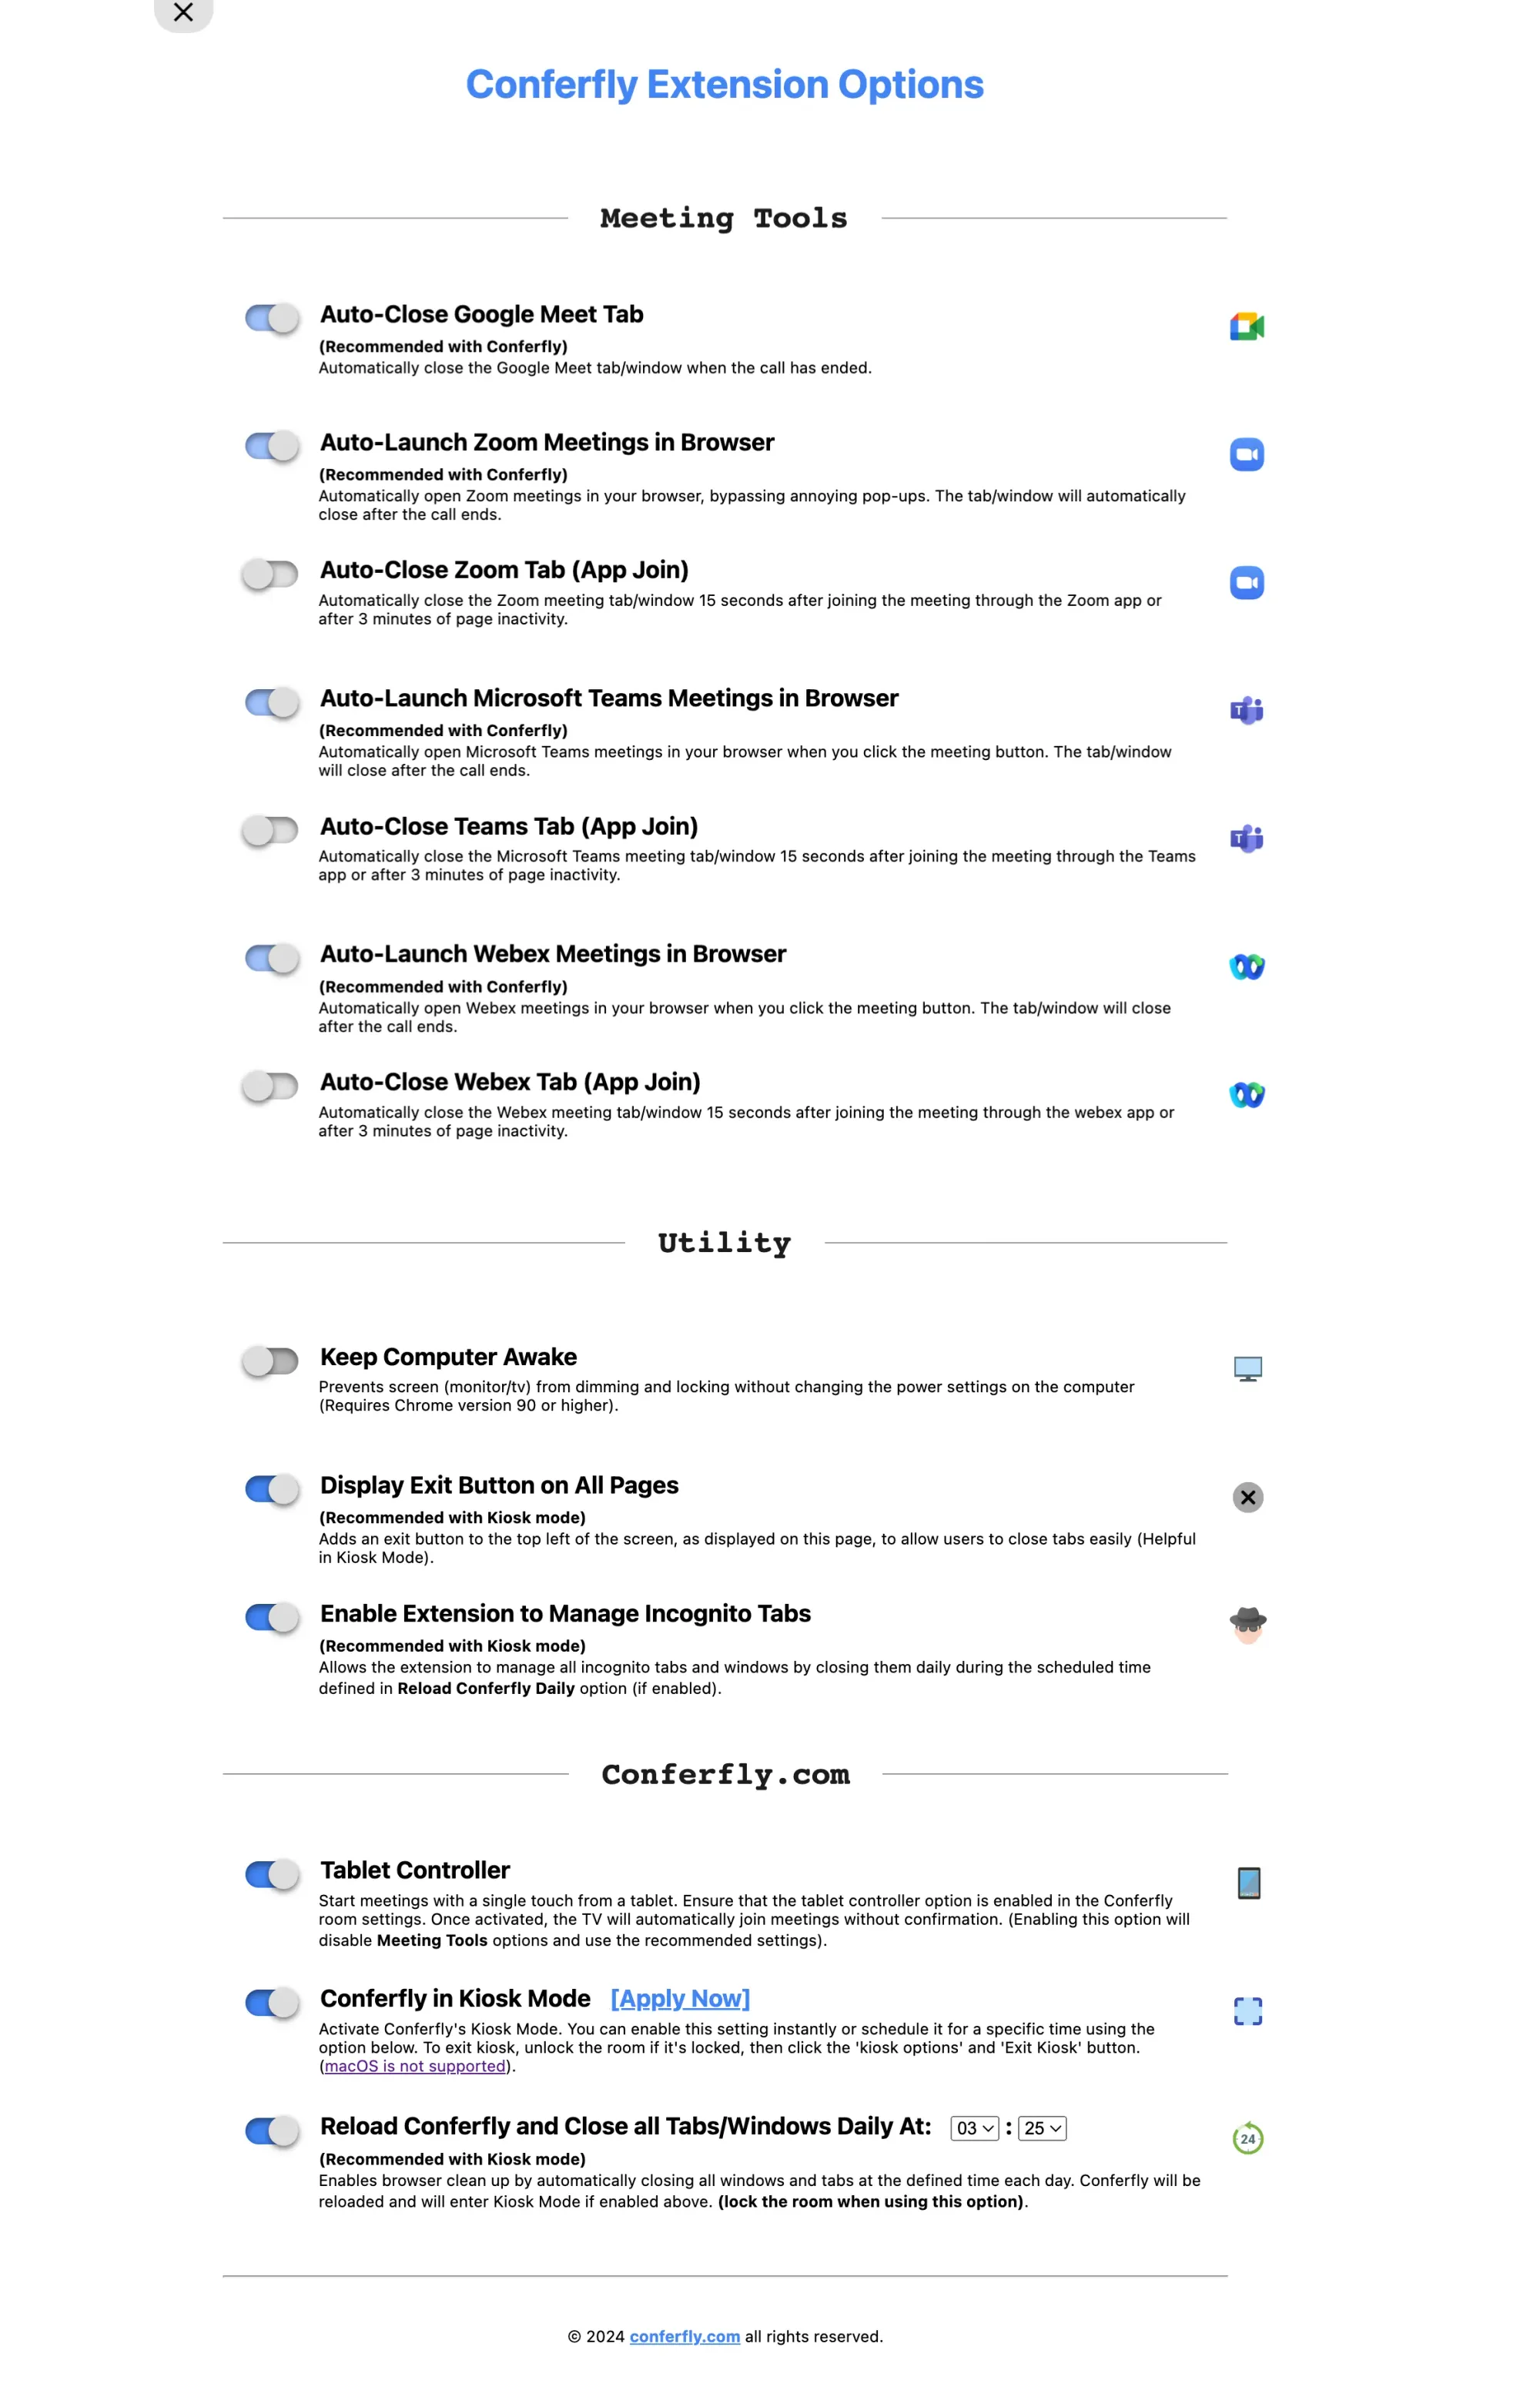
Install Conferfly Extension. The extension seamlessly integrates with the Conferfly app and intelligently starts or closes meetings, among other features. Enable all options, as shown in the image below, for a full setup.
Step 8: Enable Kiosk Mode
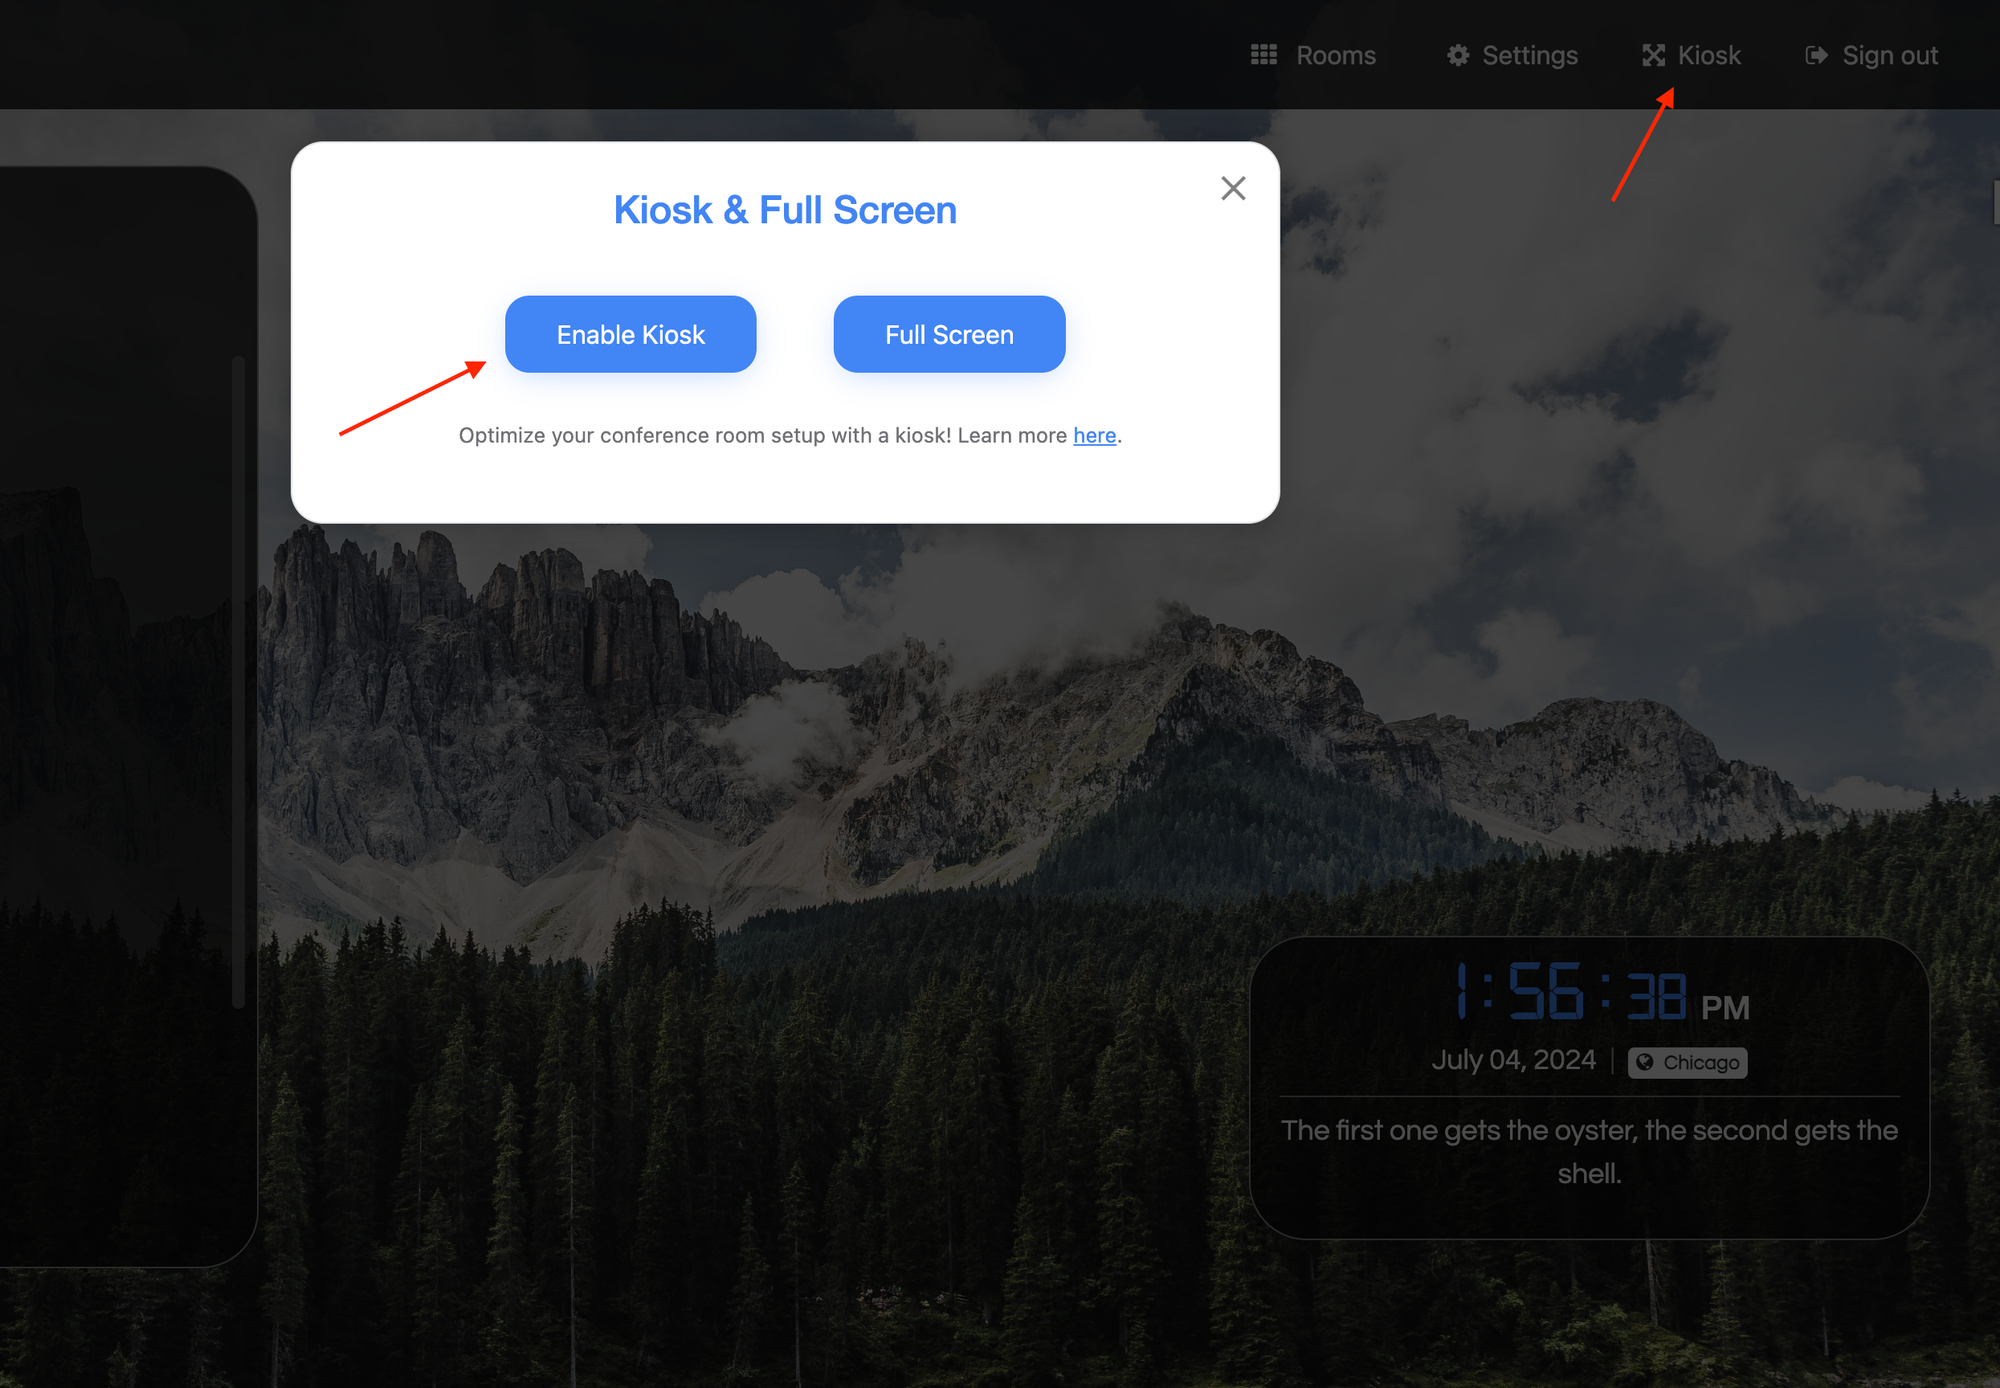
From the header, tap on the kiosk button and then "Enable Kiosk" as shown in the image below. This action will close all windows and set Conferfly in kiosk mode.
To exit kiosk unlock the room if it's locked. Then, tap the Kiosk button in the header and select "Exit Kiosk".
Note: To reload the app in Kiosk mode, hold the refresh button for 3 seconds.
Step 9: Lock the Room
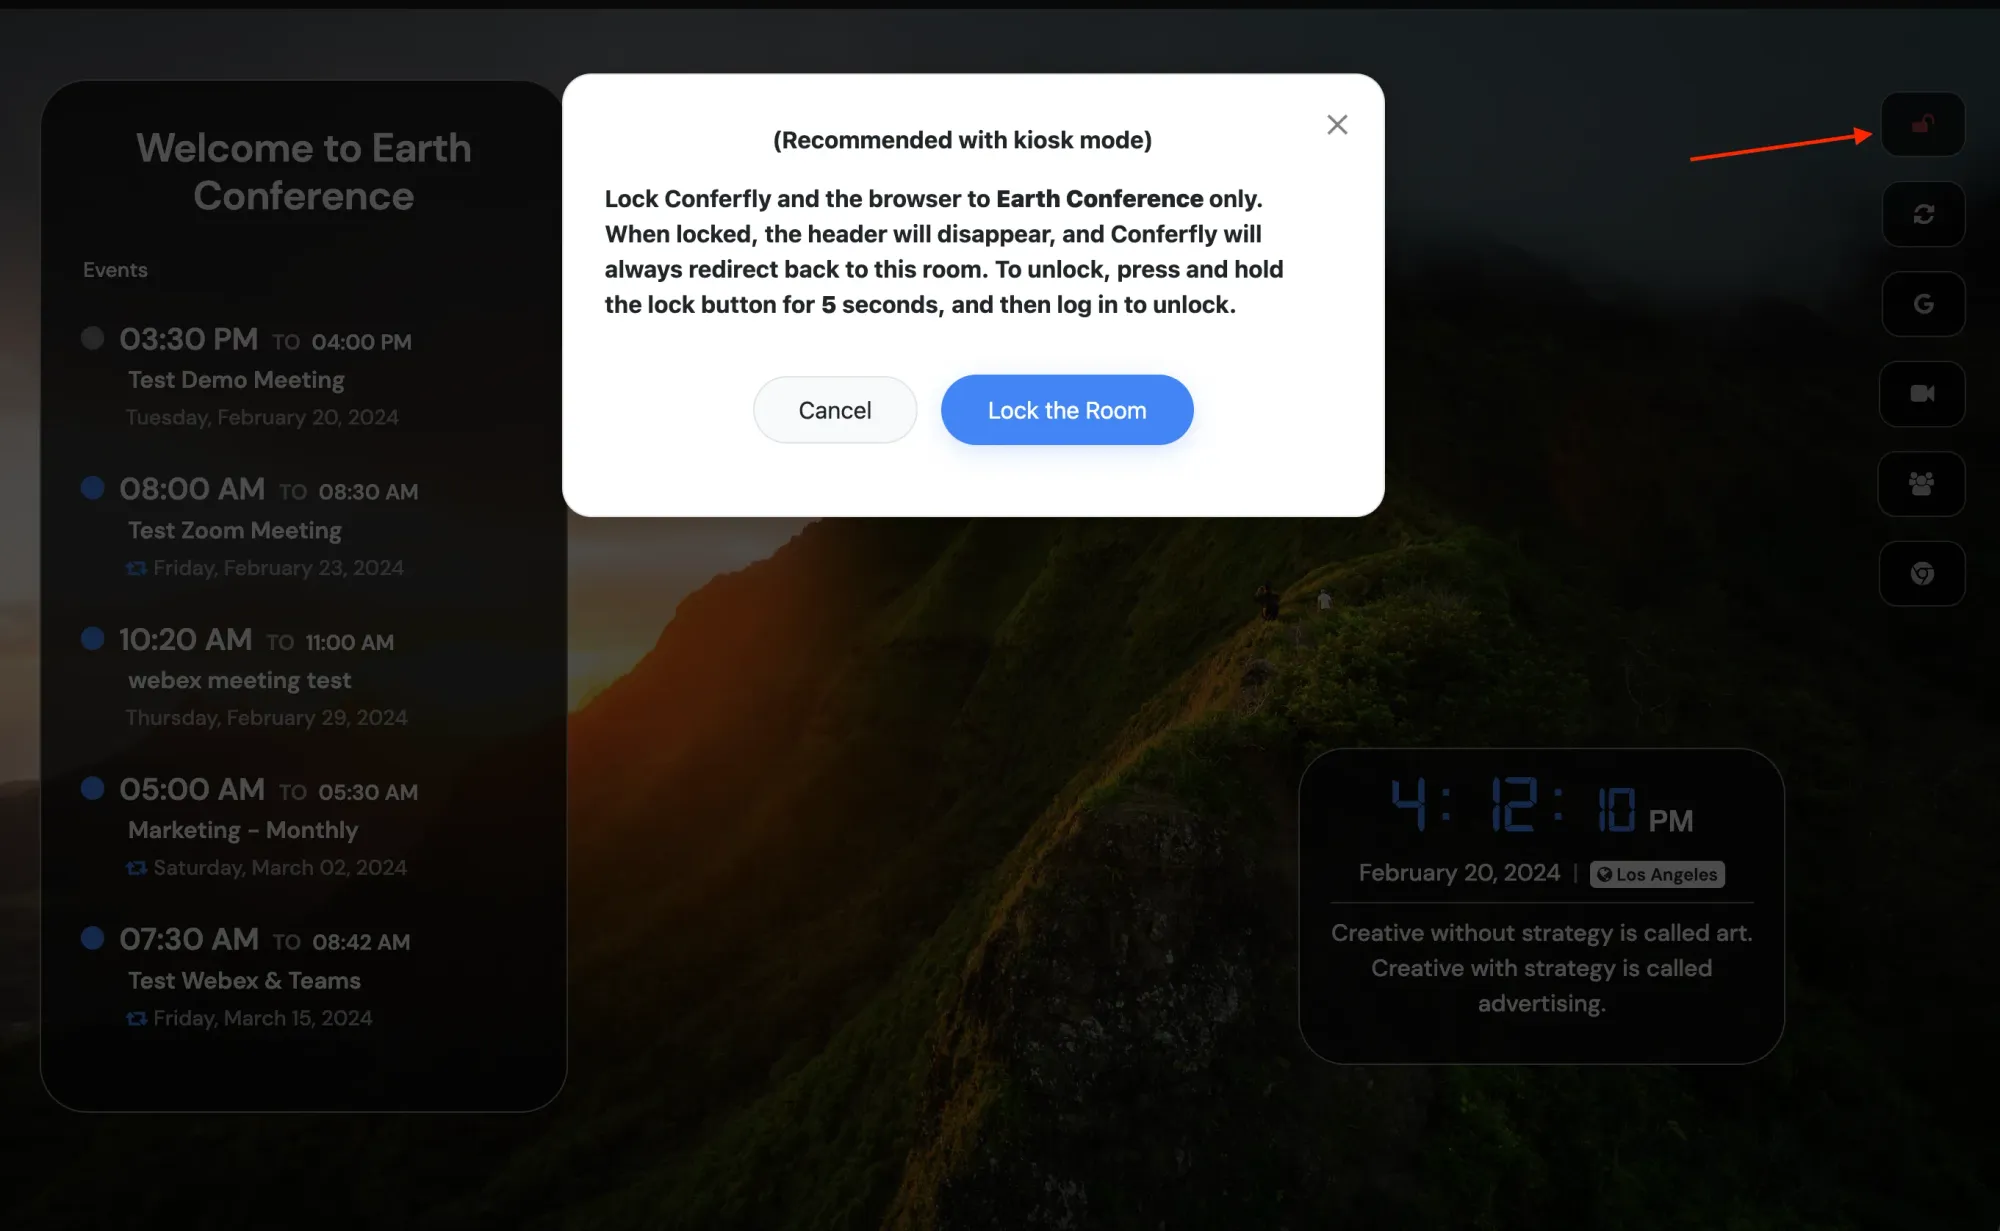
Lock the room by clicking on the lock button, as shown in the image below. This action will lock Conferfly and the browser to that specific room only. When locked, the header will disappear, and Conferfly will always redirect back to this room. It’s very important to prevent users from exiting kiosk mode, changing settings, selecting the wrong rooms, and accidentally logging out.
To unlock, press and hold the lock button for 5 seconds, and then log in or enter the lock PIN.
Step 10: Join your Video Call!
Click the join button using the computer or tablet in the room, and then the meeting will start automatically. If the video call is in the calendar invite, the join button will be visible.
Microsoft 365: If you are not seeing the join button and meeting details, including meeting titles, click here for the permission setup guide.
If the video call was not already added to the invite, then you can add it by editing your calendar event. If the invite comes from outside your company, then you need to edit/duplicate the event and add the conference room to the event. After that, click the refresh button on the conference room device. The refresh button is located on the far-right portion of the room/tablet.
You can also join a video call manually by clicking on the meeting tools buttons on the right and typing in the meeting ID. This works for Zoom, Teams, and Google Meet.
Conferfly Room will leverage the web app versions of Zoom, Teams, Google Meet, and Webex for the meetings, so it’s very important to test the camera, speaker, mic, etc., on the browser for these platforms to ensure everything is working as it should. Additionally, you may need to log in with the conference room account on those platforms.
When you end the meeting, the Conferfly extension should automatically close the window and return to the Conferfly room.
For further optimization and automation of your conference room, click here.
Conclusion
Our goal is to give you back those 5 minutes for every meeting you join. We aim for the setup to be as seamless as possible, and we hope this guide addresses any potential questions you may have. If not, please feel free to contact us at [email protected], and our team will be happy to assist you!


